Article: Adding New Item - Content
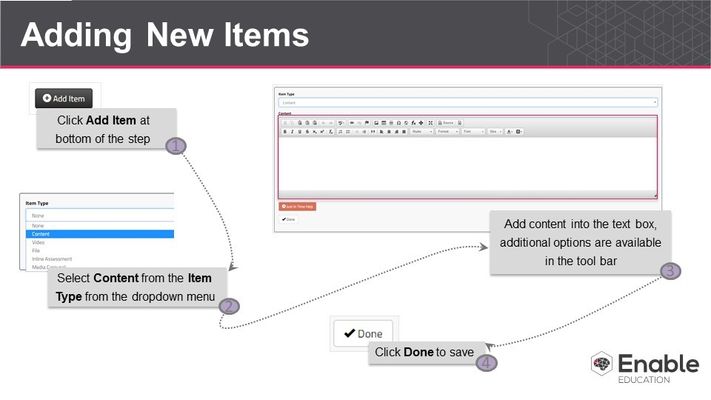
To add a text item to a step, first click Add Item at the bottom of the step you’d like to add to. In the Item Type dropdown menu, select Content as the item type. The content can be typed directly into the text window. The toolbar along the top of the window provides a variety of standard text-editing options, such as numbered and bulleted lists, and font colour, type, size, and effect. The toolbar also includes a selection of special characters in the Ω button.
In the text you can also create tables. To create a table, click the Table button in the toolbar. This opens a Table Properties window. In this window you can select the number or rows and columns and enter a table title (in the Captions window), as well as several advanced settings. After creating the table, you can edit the properties by right-clicking the table and selecting the appropriate option.
Another item you can add in the text is links. To add an in-text link, first click the Link button. In the popup window that appears, you can either add a webpage link or a file link. To add a webpage link, start in the Link Info tab and enter the URL of the link you wish to add in the URL window. If you would like to link to a file, start in the Upload tab and click Choose File. Browse to the file you wish to add. Once it’s selected, click Open. Next, click Send it to the Server. Then click OK. On the student’s side, the link will either open up the webpage or download the file you’ve added.
When you’re finished editing the content item, click Done to save your changes.